Sourdough starter is the heart and soul of sourdough bread. It's a living culture of yeast and bacteria that, when properly cared for, can produce loaves of bread with a complex flavor and beautiful texture. But what you store your starter in can make a big difference in its health and performance.
Why Does the Jar Matter?
You might be wondering why the type of jar you use for your sourdough starter even matters. After all, isn't it just a container for some flour and water? Well, it turns out that the material, size, and shape of your jar can all impact your starter's health.
-
Material: Sourdough starters are acidic, and some materials, such as metal, can react with the acid and leach harmful substances into your starter. Glass is the best material for sourdough starter jars because it's non-reactive, easy to clean, and allows you to easily monitor your starter's activity.
-
Size: Your starter jar should be large enough to allow your starter to double or even triple in size during feedings without overflowing. A jar that's too small can restrict airflow and hinder the growth of your starter. On the other hand, a jar that's too large can waste space and make it difficult to see how much starter you have. A good rule of thumb is to choose a jar that's at least twice the size of your starter's starting volume.
-
Shape: Jars with straight sides are ideal for sourdough starters because they allow you to easily scrape down the sides of the jar during feedings. This ensures that all of the starter is incorporated into the new feeding, preventing the buildup of old starter and promoting a healthy starter culture.
The Best Jar for Sourdough Starter
Based on the factors mentioned above, the following type of jar is widely considered to be the best for sourdough starters:

- 3/4 liter Weck jar: Weck jars are made of high-quality, durable glass and have straight sides, making them ideal for sourdough starters. They also come with a unique lid that creates a loose seal when filled with starter when the rubber gasket and clips are not employed. This help to prevent mold growth and contamination while allowing for gas exchange.
Other Suitable Jar Options
While Weck jars are the gold standard, there are other types of jars that can also be used for sourdough starters:

Mason jars: Mason jars are a popular and affordable option. They come in a variety of sizes and are readily available at most grocery stores. However, Mason jars typically have rounded shoulders, which can make it difficult to scrape down all of the starter during feedings.
Also lids on Mason jars screw on which may make a tight seal that can become explosive. Ball sells apur and measure cap for wide mouth jars that keeps bad things out and allows the gases of fermentation to escape easily.
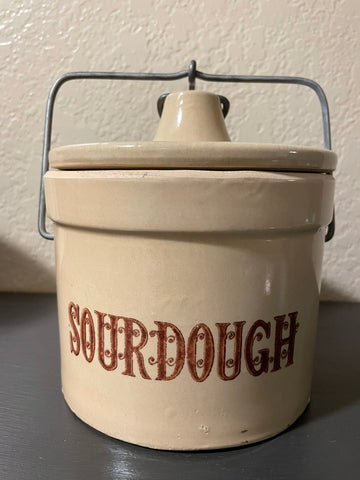
Ceramic crocks: Traditional sourdough starters were often stored in ceramic crocks. This was the standard in days gone by.
However, while crocks can provide a good environment for your starter, they can be difficult to clean and may harbor mold if not properly maintained.
Cleaning and Maintaining Your Starter Jar
It's important to clean your starter jar regularly to prevent the buildup of old starter and bacteria. Here's how to do it:
- After removing the discard before your feeding, rinse the jar thoroughly with warm water.
- You can then wash the jar with a mild soap or dishwashing liquid. Be sure to rinse the jar well afterwards to remove any soap residue.
- Allow the jar to air dry completely before returning your starter to the jar. This will help ensure a mold free container.
By following these tips, you can choose the perfect jar for your sourdough starter and ensure that your starter has a healthy and happy home.
Loose is the Key When Covering Your Starter
It's a good idea to cover your jar to keep out insects and other unwelcome visitors. But remember, a tight seal is a no-no. Fermentation produces gas, and it needs to escape, otherwise the whole thing may explode!

Here are some covering options:
- Weck Jar's Champion: If you use a Weck jar, the glass lid resting on the grooves provides a loose enough as long as you do not use the rubber gasket and clips, which hold it tightly in place (see picture here without clips).
- DIY Options: For screw-on lid jars, use reusable plastic wrap, a plate, or another jar lid – just make sure it covers completely and is not screwed tightly in place.
Bonus Tip: Use a Rubber Band Height Tracker
While starter height isn't the ultimate indicator of feeding time, it can help you visualize fermentation. Here's a neat trick:
- After feeding your starter, place a rubber band around the jar at the starter mixture's height.
- This simple method lets you track how much your starter rises during each feeding interval.
The Perfect Tool for Keeping Your Sourdough Starter Happy and Healthy
Just like the jar you choose for your sourdough starter, the tool you use to mix it daily can have a big impact. Forget the parade of spatulas – wood, metal, plastic – that you have in your kitchen and look for one with these ideal qualities:
-
Shape Matters: A flat side is essential for scraping down the jar walls, ensuring no starter gets left behind. A curved design that reaches the bottom corners of the jar is also important for scooping out every bit of starter.
Maurizio Leo at "The Perfect Loaf" recommends the OXO Good Grips Silicone Jar Spatula on Amazon, but I found one with similar specs at my local grocery that seems to work fine.
- Material Musings: Opt for a non-stick material that makes cleaning the spatula a breeze. Silicone is a popular choice because starter wipes right off, and tough messes can be handled by the dishwasher.
- Handle Heft: A sturdy handle is essential for effortless stirring, even for thick sourdough starter. However, a little flexibility at the tip can be helpful for navigating the nooks and crannies of any jar.
Keeping Your Jar Clean is a Spatula's Superpower
Every feeding starts with discarding some starter. Here's where your trusty spatula comes in:
- Stir the starter well.
- Use the spatula to scoop out a large portion for discarding, leaving just a bit behind (60g / 1/4 cup).
- Next, scrape the jar sides down with the flat edge to dislodge any clinging starter.
- Feed the starter using your primary flour choice and water in equal parts, but twice as much of each as compared to the 60g /1/4 cup starter left in the jar.
-
For the rim, use a reusable cloth or a paper towel to prevent starter buildup.
Here are some answers to frequently asked questions about sourdough starter jars:
Airtight or Not?
Sourdough starter produces gas during fermentation. Trapping this gas in an airtight container can lead to pressure buildup, potentially cracking the jar. It's best to use a lid that allows gas to escape while keeping out contaminants. Here are some options:
- Loose Lid: Leave the lid on your jar but don't screw it on tightly.
- Mason Jar Trick: With screw-on lids, rest the lid loosely on top of the jar.
- Creative Covers: Use reusable plastic wrap, a plate, or another jar lid (as long as it provides some coverage).
Choosing the Right Size
A good rule of thumb is to choose a jar that's at least twice the size of your starter's starting volume. This allows room for your starter to double or even triple in size during feedings without overflowing. For example, if you start with 100 grams of starter, a 1-liter (32-ounce) Mason jar would be a good choice.
Keeping Your Jar Clean
Regular cleaning is important to prevent the buildup of old starter and bacteria. Here's a routine you can follow:
- Daily Wipes: Wipe the top and rim of your jar with a clean cloth or paper towel after each feeding. This removes any starter that might have dripped or crusted on the rim.
- Periodic Deep Clean: Every few weeks (or when your jar gets noticeably dirty), transfer your starter to a new, clean jar. This gives you a chance to thoroughly wash your old jar with warm water and mild soap.
By following these tips, you can ensure your sourdough starter jar provides a clean and healthy environment for your bubbly friend to thrive. And with the right tools and techniques, you can keep your sourdough starter happy and healthy.
Now you can focus on the real prize: baking delicious sourdough bread!
3 comments
I don’t have a scale. can I use measuring cup to get my starter going
Don’t ever wash your jar with dish soap that is labeled antibacterial. It killed my kefir grains and would likely kill your starter.
I am new to working with sourdough. You have answered so many of my questions. Thank you.