Frankly, folks, I do not know what has gotten into me lately, but I have baked baguettes and bâtards daily for the last two weeks. It all started with a notice from Allen Levie on June 5th announcing the arrival of a truckload of Abigail’s Premium Flour.
I had pre-ordered two 50-pound sacks, so I hurried right over to the Bakery Store in Spanish Fork to pick them up. Little did I know the surprise in store when I started baking later that day.
With the first splash of water I mixed into this flour, I knew I was in for a treat. The fresh aroma of just milled wheat drifted up into my smiling face. This premium flour's color and creamy taste are unlike any other I have purchased, even the ones I have imported from England.
As bread flour goes, this one develops strong gluten strands almost when combined with water. Its workability is truly pleasant, so much so that, as I already wrote, I have made more than 30 baguettes in the last two weeks.
Baguettes vs. Bâtards
One of the reasons I like baguettes is the size-to-surface ratio. When you put them in a hot oven with steam, they nearly always double in circumference. Then, as the moisture inside the little loaves expands and escapes, bursting the surface scoring, the loaves dry a bit, and the crust browns and blisters. It just makes for a most scrumptious, crispy loaf of bread.
Customarily, baguettes are distinguished by their crisp crust and long length (26 in/65 cm). Some are made a yard long (up to 1 meter), but that will not fit in a home oven.
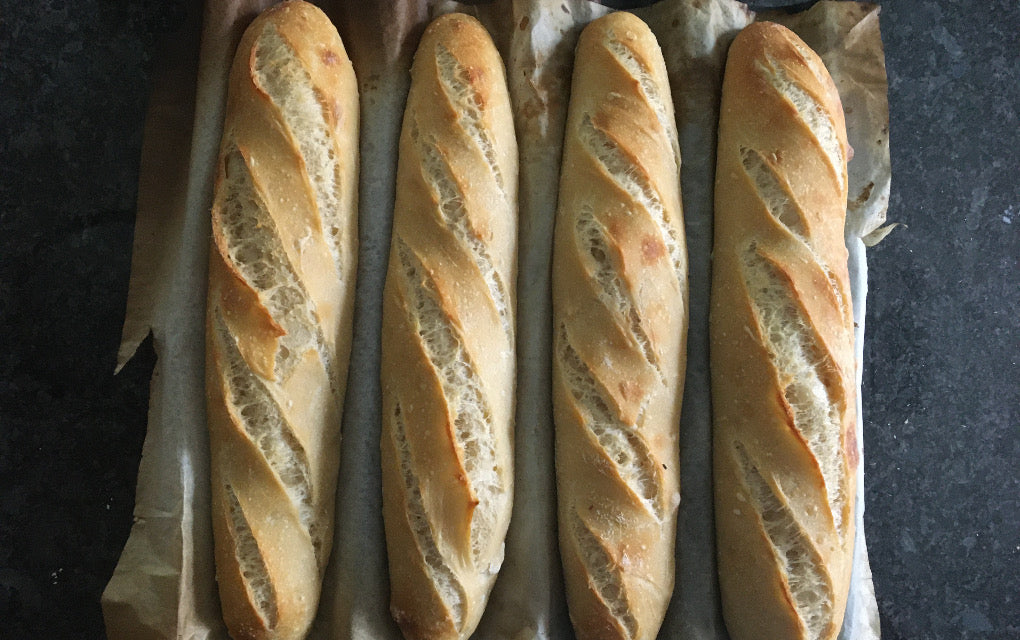
For that reason, I tend to make bâtards, which are baguette-esque. They are just shorter and plumper than a typical baguette—usually 6–12 inches long (15 to 30 cm) and thicker than the baguette; these were perfect for the hero sandwiches I served today.
Basic Ingredients
First, I suggest using our three perfect ingredients: Real Flour (from Abigail’s Oven), Real (purified or filtered) Water, and Real Salt to make the Basic Country Loaf. This includes:
- 2 cups (480g) lukewarm water
- 4 cups (500g) of flour
- 1 Tbl (17g) salt mixed with 2 Tbl (30g) water
all of which are based on the Tartine Recipe and make three small or two very large bâtards.
Chad Robertson of Tartine Bakery says, “Of these three ingredients, flour is the most important in determining the character of the final loaf. The flavor of the bread comes from the flour and the effect that fermentation and baking have on it. Whole-wheat and rye flours ferment more actively than white sifted-wheat flours.”1
Though you can use those other flours and even all-purpose flour, we recommend Central Milling Organic Artisan Bakers Craft. This kind of bread flour is also found at King Arthur and Prairie Gold Flour–Montana Wheat.
Robertson says:
“The freshness of the flour has a significant impact on the flavor of the final loaf. For those of us who don’t mill our own flour, ‘fresh’ flour means that it was milled a week or two before baking with it. I recommend using sustainably grown, freshly milled flour from as locally distributed a source as you are able to find. Excellent bread can be made by milling your own flour and using it to make bread as soon as it cools, but note that fermentation will be noticeably more active when freshly milled.“2
My Start is a Biga
Biga is an Italian term for a pre-ferment usually at 60% hydration and is typically drier and stiffer than most other sourdough starts. These are often made with commercial yeast but can be a piece of raw dough left over from your last loaf.
When making bâtards daily, this is the easiest way to leaven your bread. This gives your bread a kick-start, speeding up fermentation, but still delivers the flavor you want in sourdough.
To use an “old dough” biga, just pull off a piece of raw dough from your last batch about the size of a golf ball. Mix it with the water in the recipe until it is mostly dissolved, then add the flour from the recipe and let the dough rest.
|
This resting period, developed by Professor Raymond Calvel, a French bread expert, is now in everyday use and is known as the autolyse (AUTO-leese). This resting stage promotes the forming of gluten chains and releases flavor in the flour into your bâtards, baguettes, or boules. After 30 minutes, you can add the salt and add additional water. Mix this in by turning, stretching, and folding the dough three to four times. I repeat this two more times, then put the dough in the fridge overnight for a long, cold ferment. |
|
This first ferment, called the bulk rise or bulk ferment, “is when the dough's strength, flavor, and structure are set. … [it can be] accomplished in 3 to 4 hours if the dough is maintained at a temperature of 78°F[25°C] to 82°F[28°C].”4 But I prefer the longer, colder bulk ferment for the flavor imparted, so mine is in the fridge overnight. Cold dough also makes handling and shaping it much more manageable.
Shaping and Bench Resting
When you divide the dough into pieces for shaping, you may ask yourself, “Should I give the dough a long bench rest to develop more strength, or should I shape the dough twice to give more tension?”5 Asking these questions helps you make adjustments, like letting it rise longer on the bench if it seems heavy. Or you can give it two or more shapings with another rest in between.
Because I usually work with cold dough, I need a long bench rest for it to warm up. Then I shape it and often let it proof for several hours. “Take your time,” Robertson admonishes, “it will only make the bread better.”6
When it comes to shaping bâtards and baguettes, practice makes it perfect. I never quite got it right for months, but suddenly I did. I got the most help from Maurizio Leo's The Perfect Loaf.
“To shape a classic bâtard, gently pat the risen dough into a thick rectangle. Fold the bottom half to the center and press with your fingertips to hold the dough in place and seal the seam. Fold the top half to the center, and once again press with your fingertips to seal the seam. Roll the top half of the dough over the seam to create a new seam on the bottom of the loaf.
“Pinch the new seam closed with your fingertips or the edge of your hand to create surface tension on the outer skin, making a tight loaf. Gently rock the loaf back and forth to extend it to the desired length, typically 6 to 12 inches.
“To create a torpedo shape, taper the loaf slightly at each end with increased hand pressure while rocking the loaf. Transfer the shaped loaf to a floured proofing cloth or an oiled pan, seam side down, cover, and proof.”7
Once you have gotten the hang of the torpedo-shaped bâtard, you can use one to make the longer and thinner baguettes. But you need to be sure that the length is no longer than your stone or baking sheet.
When I make a bâtard, I usually weigh the dough to be about 16 ounces (450g), but Reinhart suggests that a baguette should be about 10 ounces (283 g) to fit your home oven or baking stone. He explains:
“To shape a baguette, start by making a bâtard, then let it rest for 5 to 10 minutes. Repeat the same folding process: bottom to center, top to center, and pinch to create a seam. Seal the new seam with your fingers, thumbs, or the heel of your hand. It should create a tight surface tension. Then, with the seam side underneath, gently rock the loaf back and forth, with your hands moving out toward both ends and increasing the pressure at the ends to slightly taper the loaf. Repeat this rocking as needed until the baguette is the length of the baking sheet or baking stone. Transfer the shaped baguette to a floured proofing cloth or pan, cover, and proof.”8
For me and many others, shaping a baguette is quite challenging. Maurizio Leo at The Perfect Loaf says, “Shaping baguettes requires practice. Do not get discouraged when shaping; take it slow, and focus on one motion at a time.”9 He has great instructions and a helpful video here:
“Once rolled out,” Maurizio says, “transfer with two hands to a liberally floured couche for their final proof on the counter.”

The Final Rise
The final rising times are variable. With warm room temperatures around 80°F (27°C), your bâtard will be ready for baking in 3 to 4 hours. However, if you don’t cold retard the final rising, the bread will have very little sour flavor, but the character of wheat will come through. No matter what, you will benefit from sourdough, which will make your loaf stay fresh longer and have a more complex taste.
Cooling (retarding, or slowing), the final rise in the refrigerator lets you bake when you want and imbues the bread with intense flavors. A longer final rise promotes a slower fermentation, building to the optimal tangy taste sourdough is known for. That means can control bread flavor with a sweetness “that no one would think to call sourdough, or you can make substantially stronger-flavored bread to your taste.”11
Baking a Bâtard
Preheat the oven with a baking stone or sheet pan for half an hour at 500°F (260°C). When it is hot, take a pizza peel (or baking sheet) lined with parchment paper and roll the bâtard or baguette onto the sheet. If there are more, leave space between each bâtard or baguette until your baking stone or sheet is filled.
Once they are all on the parchment paper, score each with several shallow slashes beginning at one end and overlapping about 20 percent of each previous slash. Then, slide the parchment with the dough onto the hot baking surface.
Because these loaves are smaller, they will take less time to bake than larger boules and batons.
- Bake bâtards for 20 minutes with steam at 475°F (246°C), then vent the steam and turn the oven to 450°F (232°C) for 5-10 minutes more until they are crispy and golden and have an internal dough temperature of 200°F [73°C].
- Bake baguettes for 15 minutes with steam at 450°F (176°C), then vent the steam and turn the oven to 425°F (152°C) for 5 minutes more until they are crispy and golden and have an internal dough temperature of 200°F [73°C].
Usually, mine only takes 10 minutes, but I cure them in the hot oven as it cools down by turning the oven off and leaving them in for the remaining time. Cool them some before slicing if you can wait. I usually can’t. These garlic rosemary bâtards are just hot out of the oven.

We can’t wait to hear about your experience with bâtards and baguettes; they have undoubtedly become a favorite at my place. Tell us about it in the comment section below.
Endnotes
1 Robertson, Chad. Tartine Bread, Chronicle Books LLC. Kindle Edition.(pp. 70-71).
2 ibid.
3 ibid.
4 ibid.
5 ibid.
6 ibid.
7 Reinhart, Peter, “Peter Reinhart’s Artisan Breads Every Day: Fast and Easy Recipes for World-Class Breads [A Baking Book] by Peter Reinhart, Ten Speed Press, 2009
8 ibid.
9 Leo, Maruizo, “Sourdough Baguettes,” The Perfect Loaf, July 30, 2018
10 ibid.
11 Robertson, ibid (pp. 76-77)
1 comment
Respectfully, you’ll have 280 g baguettes burnt to a crisp if you bake them at 475F for 30-45 mins as you suggest. I bake mine at 475F for 10 mins with steam and then reduce the oven to 450 for about mins more. You can also leave them crisp a few more minutes by turning off the oven and opening the door partially after baking is complete.